









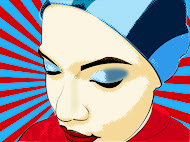


Hi people
I know it has been a long long time I didn't update my blog...hmm sorry about that, ok!!! So this time I want to promote this product. I know that you guys familiar with 88 and 120 palletes, and now I am happy to inform you guys that you can get it here only for RM 55 for 88 pallete, and RM 75 for 120 pallete.
88 Palette Eyeshadows (RM 55)


120 Palette Eyeshadows (RM 75)


I can guarantee you the colours' quality really good and very pigmented....and trust me will love it so much.
And will post some of the look that I used with these 2 palletes eye shadows soon. Just wait ok!!
So people if really want or cravin' for this stuff just mail me at this email address: duniafirdha.info@gmail.com to send your details and payment proof. Please refer below account detail for payment;
terms and condition refer below

~ Any question just SMS/ Call me:
Amirah @ Amiza Binti Ab Aziz (019-2618002)
~ Made your payment here:
164258419080 (Maybank)
~ Delivery will be after 48 hours after payment made:
Delivery charges = RM 6.00 (Semenanjung Malaysia)
= RM 8.00 (Sabah & Sarawak)
So don't forget to ring me if you are interested or have any questions about this 2 marvelous palletes

88 and 120 Palletes Eyeshadows for You!!!
Thursday, October 15, 2009
Kota Bharu's Make Over Mission!!!!!
Wednesday, June 10, 2009
Ok...It's been ages I didn't I update my blog...hehehe sorry for that last Monday I went to Kota Bharu..well balik kampung. So just as always I never waqste any minutes to do a make over...and this time the victim is my auntie....
Ok let tell you something, she never do make up...I mean serious make up. All she did just lipstick (very pale pink... and you barely see it) and powder....that's all....so all I did to her last monday really, trully new to her.....check her out
this her before...pretty plain heh?
And This is her after...jeng..jeng....jeng

 So what you guys thinkking...pls gimme comment ok....
Naught to Nautical Theaterical Look.....
Saturday, May 2, 2009

Hi everybody..... as I promise you before I will do more dramatic look, so today I have re-created this look from Make up Guru named MissChievous (check her link here: http://www.youtube.com/user/MissChievous). I like her so much, because she is so creative and so versatile, please check her work and you will be impressed with her work even though she never has any proper make up education.
Anyway, this the look that I have re-created:


Below are the steps that I did to do this look:
- I use white colour for half of the eyelid. From the inner eyes, to the middle...make it half. (Before that I wet the brush with toner, to get more colour intense.
- Then I put blue navy colour to the other half my model eyelid.
- Blend the blue with white
- I created a thick liner on the crease.
- Then on top of the liner, Put the navy blue colour with a wet brush from the inner corner to the middle section.
- To the other half, I put white colour eyeshadow with a wet brush.
- Blend it well.
- For the eyebrows I filled them with black liner colour.
- For the blush I used shocking pink colour to give more dramatic look.
- As for the lips I coloured it with red colour.


p/s: All the product I used:
- Eyeshadows from Elianto
- Blusher from coastal scents
- Lipstick from MAC
- Eyeliner from coastal scents
Please watch this video, on how to create this look.
Brilliant Manual By Bobbi Brown
Thursday, April 30, 2009

Heeeeiiiilllllooooo people! Ok today I want to talk about t his new book from Bobbi Brown (Ok...I know it's not that new but I just got it, so it's new to me). I like the book so much and you can learn a loads of tips and tricks here from this superb manual. I would say she really gives you what you really want to become make up artist.
What I like most about this book, that she never really restricted any particular techniques or styles to adapt/ follow...all she say is follow your style because anything works for you then just keep doing it. I also believe that all pro make up artists have their own styles and the styles really works for them, actually that particular style makes them famous. So just embrace your style and go for it!!
This book really inspired me to pursue my dream as make up artist, and I know there are so many things I need to learn to improve my make up skills. Pray for me folks!!! To be frank I really can't find my confident yet, and that's why I never try to be part time make up artist (for bridal purpose). Well may be one day....sooooonnnn.
So for you people out there, if you really love this make up thing...I think this book is for you. And TRUST ME it is SUPERB!!!!
Mekap-mekap Contest!!!!!
Friday, April 24, 2009
OK....I know it's been a long long and long time I didn't update my blog. Please forgive me, coz I've been busy juggling between my work and my family (especially when your new boss is a baby ~ my daughter 9 months old).
Anyway, last week I have join this make up competition and my make up has been inspired by Princess Jasmin from Aladdin and the other one is from Cleopatra. For more detail, you can visit this blog: http://mekap-mekap.blogspot.com. And please don't forget to vote for me ok!!!!
Hmmmm..... so now it's the moment of truth, let see the result of my art work:
(As Princess Jasmin)


Ok this (as Cleopatra)


Hmmmm...What a Challenge!!!
Thursday, March 19, 2009
I was quite scared coz she is expert....she is 56 years old now and she started wearing make up since she was 19 years old until now. I mean she is really master about all this make up thingy. Then I think again,well it's a good challenge and practice to me, so I just accept her challenge and below are the results. (So sorry that I don't have her before look and also for the image quality, I forget where I put my camera so I just used my handphone to take er pictures)


Did I mentioned that she is 56 years old? Frankly speaking I love this look so much on her but then again it's very hard to please her, she doesn't like the smokey blue on her.....but mom you still look beautiful and young to me. So people what do you think?
New Makeover Model.....
Monday, March 16, 2009
So now I have something to show your guyz.... This is my sister and she is my victim for this time. After this I promise I will show you people out there something more dramatic and fun in the future, however for this time just take look at her makeover that I did to her.
 This is her before.....
 This is her after the makeover.....
 This is eyes makeup
Below are pictures:


Applying Lipstick
Thursday, February 19, 2009

Ok, your look almost finish. Just need one more touch to make it complete. So ready with your lipsitck guys then you are ready to party..... Personally I love lipstick so much and it really bring the vibrant to my face. I can go bare face without anything except lipstick, because it makes me look healthy. So check this article out, (again this article taken from www.free-makeup-tips.com)

Lipstick has been around for about 5000 years! It is the earliest and quickest way to give your face a focus and create an instant splash of colour. To apply lipstick properly, it is important to have the right tools handy for the best application of lip makeup and get the setting right, in sync with the occasion. The first step is to choose the best shade of lipstick according to the skin tone. Like the colors of rainbow, there are shades of virtually every color when it comes to coloring your lips. With a lighter complexion, the lipstick is used more to subjugate your skin tone. Lighter shades make a fair complexion seems paler and dull. Go for bright colors and avoid light pinks.

How to Apply Lipstick
Ensure your lips are soft and supple by smoothing over moisturizer before you start applying Lipstick.
Prime your lips by smoothing them with foundation, using a makeup sponge so you reach every tiny crevice on the surface.
Dust over the top of the foundation with a light dusting of your usual face pow
der, to help you rLipstick stay put for longer.
Rest your elbow on a firm surface and carefully dwar an outline us
ing a lip pencil. So it does not drag you skin, it may help to warm it slightly in your palm. Start by defining the cupid's bow on the upper lip. Finish by completing the edges of the outline to the upper lip.
Use a lipbrush to fill in the outline with lipstick, ensuring you reach into every tiny crevice on the surface. Open your mouth to brush the colour into the corners of your lips.
You will help your lipstick last longer if you blot over the surface with a tissue. It will also give an attractive, semi-matte finish to your lips. Reapply to help a longer lasting finish.
Makeup kit essentials for applying lipstick properly

The essential items for applying lipstick properly is having the right shade of lipstick handy with a lip brush, lip base/balm, lip liner and gloss, depending on individual taste.
A lip liner defines the lips and prevents lip color from bleeding, giving it durability. They are available in pencil form and should be matched with the shade of lipstick used.
Gentle brushing around the lips with a soft toothbrush helps to exfoliate dead cells around the mouth area and give a clear, defined shape to the lip line.
Applying a touch of foundation/lip base onto the lips helps lipstick stay on longer and a neutral or lipstick matched liner used to outline the lips after this. The lip liner must be started from the center of the upper lip, drawn into a line towards each corner and follow the edge of the natural lip line.
The color can be filled over the lips with a lip brush in slow, deliberate strokes and lipstick that has a formulation for transfer-resistant color stays for a longer time.
If the lip pencil is chilled in the fridge for a few minutes before application, it glides on smoothly and the outlining of the lips is easier.
Lip conditioners used in lipsticks give it longer staying powder and are ideal for party wear or all daywear too, while keeping the lips moist and nourished for hours.
After the first application is over, the lips must be stretched and the liner repeated lightly again, blotted with a tissue and lip color re-applied with a lip brush for a no-budge, no-smudge, luscious lip wear.
Making the mouth round as an 'o' prevents lip color from spreading onto the teeth.
Liners and gloss are best avoided for a lip that is too full, but just a hint of lacquer brings a glow to the face.
Lipstick Tip Submited by Visitors
Go over your lipstick with an ice cube for lasting results.
When applying lip gloss, or lipstick, apply lip balm or chapstick first.
To make lips pink take lip balm and brush with softly to your lips.
Applying Mascara

I would say this pretty much important too. I mean this mascara thing really open your eyes, make your eyes really realy sexy. So again I take this article form www.free-makeup-tips.com, so guys expand your knowledge.
Mascara adds a flattering fringe to your eyes - particularly if your lashes are fair. Applying Mascara is the final step in eye makeup. Mascara is applied on the eye lashes to beautify them. Different formulas and application of mascara can enhance your lashes in different ways. To make the eyes alluring, the use of the right eye makeup product using the correct technique is very important. For eye-popping appeal to this focal point of the face, the basic idea is to use complementary colors. Mascara adds volume and length to the lashes and make your eyes appear brighter and more beautiful.
How to Apply Mascara
Are you looking for "how to apply mascara"? Here are some tips for you..
Start by applying mascara to your upper lashes first. Brush them downwards to start with, then brush your lashes upwards from underneath. Use a tiny zig-zag movement to prevent mascara from clogging on your lashes.
Next, use the tip of the mascara wand to brush your lowe lashes, using a gentle side to side technique. Take care to keep your hand steady whilst you are applying the mascara and not to blink while the mascara is still wet. Comb through your lashes with an eyelash comb to remove any excess the wand has left behind.

Tips for applying eye mascara
- Select a suitable color. If you have blond or red lashes then go for brown mascara. Darker-lashed women can consider brown for a casual look, and black or brown-black for more pronounced or dramatic lashes.
- Before applying mascara curl the lashes to widen the eyes. Prior to your mascara, Curl your lashes with an eyelash curler and apply all other eye makeup.
- Begin with the underside of your upper eye lashes and then moving the brush slowly upward toward the tips of your lashes.
- Wait for a minute for them to dry, and similarly apply a second coat. Let the first coat dry completely, then apply the second coat. Two thin coats look more natural than one thick coat.
- Finally brush with a clean dry brush, to separate the lashes.
Selection of eyeliner shades
- For women with blue eyes, eyeliners in brown and rose tones contrast the blue of the eyes, making them appear more vibrant. Green eyes, on the other hand, brighten up with violet shades that give a dramatic look for evenings or stage makeup and look great in photographs. A mocha shade is a subtle, everyday look for all eye colors but especially brown eyes, which also give a smoldering look when green and gold eyeliners are used.
- Neutral shades in eyeliners are charcoal, black, and chocolate, good for all eye colors, except those with small eyes would do well to avoid these, as they tend to make eyes appear smaller. Thus, it is preferable to restrict dark eyeliner colors to the crease of the eye and highlight the brow bone with a light shade.
- All eye shadows need to complement the eye and hair-color of the person and a bit of powder dusted on the eyelid prepares the eyeliner to set well and intensify the eyes.
How to remove eye mascara
Mascara must be removed very carefully to avoid damaging the delicate skin around the eyes. While removing the mascara from eyes always avoid the colour from going onto the delicate area below the bottom lashes and close your eyes. Roll a cotton bud dipped in a cosmetic cleanser over the lashes, taking the mascara down onto the tissue. Repeat this till all the mascara is gone.
Applying Blusher....give a healthy glow to your cheek.
Wednesday, February 4, 2009

Give your complexion a bloom of colour with this indispensable beauty aid - blush. Apply foundation, eye color and lipstick and then apply blusher as Blush should be your last makeup step. Nothing brings a dull, drowsy face to life faster than a quick sweep of blush. "You put blush on, and you look instantly prettier, fresher and less tired," says makeup guru Bobbi Brown. Decide the color of blush you want to apply on your cheeks. Read useful advice from makeup professional on how to apply blusher.

How to Apply Blush
- First choose the color that resembles the natural glow of your cheeks after you exercise.
- Determine your face shape: are you oval, heart, round, long or square? Knowing this helps you determine where it's best to apply the blush.
- Complete the application of foundation, powder and all eye makeup before applying blush.
- Put the blush on your brush, tapping off any excess or put a dab of gel on your fingers.
- Look in the mirror and smile
- Sweep color in an arc following the line of your cheekbone up from the apple of your cheek to your hairline. Keep color light & blended.
- Blend a little blush down your cheek for a little more natural, less dramatic look.


Tips for applying blusher
For a sun-kissed sheen: dab a small bit of bronzer powder on your forehead, chin & nose. Make sure it doesn't look like a stripe.
Make sure to blend makeup into your jawline and hairline so it looks more natural. Also try using a brush instead of those square sponge things or your face will look to cakey.
- never mix blusher powder with other makeup creams
- a color that is close to or lighter than your lipstick will work best
- use apricot shades on pale skin and dusty roses on darker skin
- if your skin is oily, a powder brush will last longer
- always dip the brush quickly and flick your wrist to stroke the cheek lightly
- never apply blusher on the nose for corrective purposes
- never apply too much blusher otherwise your face will look as a mask
- dab a little shimmery blush on the highest point of your cheekbone nearest your eye to create a more distinct look
Powder Blush
This should be applied over the top of your foundation and face powder. To apply powder blusher, dust over the compact with a large soft brush. If you have taken too much onto your brush, tap the handle on the back of your hand to remove the excess. It is better to waste a little than applying too much!
Cream Blusher
Cream blusher is applied with your fingertips, after foundation, but before face powder. To apply, dab a few dots over your cheeks, from the plump part up towards your cheekbone. Using your fingertips, blend well. Build up the effect gradually, adding more blusher to create just the look you want.

Colour Choice for Blusher
There is always a kaleidoscope of blusher shades to choose from. However, as a general rule, it is best to opt for a shade that tones well with your skin colouring and co-ordinates with the rest of your skin colouring and makeup.
Applying Eyeshadows
Monday, January 26, 2009

After everything is set, so we are now ready to apply our eyeshadows for more impact to our look. This articles is taken from www.free-makeup-tips.com. So this is on How to Apply Eye shadow, Easy steps for Applying Eyeshadows and Application Tips
Eyeshadows are certainly eye catching on the entire face. It is like fun to experiment with eye shadows, eye liners, pencils, paints,and powders but most women just want to know what is right for them. Always choose neutral colours for eyeshadow to subtly enhance your looks, or play with kaleidoscope of different shades to contrast with and dramatize your colouring. For those wishing to make their eyes the focal point of attention, eye shadows, eyebrow gels, eyeliners in the right style can do the trick. Follow below given steps on how to apply eye shadow.

How to Apply Eyeshadow
1. The first rule when applying eye shadow is to blend it well so there are no harsh edges. Put the very light shade (high lighter) on the space beneath the brows up to the crease of the eye lid.
2. Apply the medium shade on the upper eyelid only. Use a lighter shade under the browbone to highlight the eyes.
3. And the darkest shade on the crease of the eyelid that is the place almost in the middle of the total eye area-above the lashes and beneath the brows. Blend both the colors well.
4. With the tip of a fine brush, apply a little shadow beneath the eyes, along the lower lash line. Smudge it lightly to give your eyes a subtle, glamorous look.
Applying Eyeshadow Tip submitted by Pav
Purple eyeshadows tend to look stunning on brown eyes as does green on hazel eyes, gold on green eyes, and for blue eyes use a blue eyeshadow in a lighter shade than your eye colour.
Eye Shadow Kit and Colour Choice
Your eye shadow kit may contain 3 shadows-a very light shade (vanilla, very pale pink, beige, silver grey etc) which is the high lighter and which gives a light shimmer on the brow bone and highlights it. The box has two more shades of the same color. Light base shadows in pale pink, yellow, cream or beige look good on small eyes; spread over the entire lid with a touch of dark shadow in the outer corners, these accent the eyes.
Apart from colour, there is a choice of forms of the eye shadows. You can choose from pressed powders, pencils, sticks, gels, crayons and creams. Pressed powders are still the most popular form of shadows, because they are the easiest to apply and control. These are available in pearly and matt textures. The effect is not long lasting, but if you apply them with a wet brush, you can get a deeper effect and increase the staying qualities of the colour.

Powder and Cream Eyeshadows
Powder Eyeshadow: This is the most popular type. These come in pressed cakes of powder either with a small brush or a sponge applicator. You can build up their density from barely there to dramatic. Apply using a damp brush or sponge if you want a deep colour for an evening look.
Cream Shadows: These are oil based and come in little pots or compacts. They are applied either with a brush or your fingertips. They are a good choice for dry skins that need extra moisturizing.
Stick Shadows and Liquid Eye Shadow: Wax based, you smooth these onto your eyelids from the stick. Ensure they have a creamy texture before you buy them, so they would not drag at your skin. Usually Liquid eyeshadow come in a slim bottle with a sponge applicator. Look for the cream-to-powder ones that smooth on as a liquid and blend to a velvety powder finish.
- Eye shadow colors matched with skin tone, eye color and hair color is what makeup experts recommend and neutral looks good on everyone.
- The first step towards applying any eye makeup is to pat some powder onto the eyelids to matte them and keep the powder eye shadow from creasing. If using cream eye shadow, this can be skipped as creams will clump and clog with the dry powder.
- Eye shadows need to coordinate with eyes and hair, not than clothes. Browns, lavenders are best for blue-eyed, blonde haired women as well as light brown eyed-ladies. Smoky grays, bronzed pinks and silver toned peaches look good on women with green or black eyes.
Eyeshadows Makeup Tip Suggested by Visitors
Try applying an eyeshadow that matches your skin tone. Apply to the lid all the way up to the eyebrow. Then apply a walnut colored eyeliner on the top lid, then smudge. Put on a dark brown mascara. You will look sophisticated, but very natural.
